Hey all you WordPress Push messaging webmasters out there, today I want to give you a quick little guide on how to enable your Website users to subscribe to you Push notifications with the click of a button, when they are on amp pages. Pretty cool, so let’s get started
What you will need
So, to enable your OneSignal AMP Button, you can’t (jet) just install their plugin and hope for the best, you will need to do a little work by yourself. But it isn’t really difficult, I will try to talk you through it without getting to nerdie… What you will need is:
- A OneSignal account ( I guess you already have one)
- OneSignal WordPress Plugin Setup on your Page
- A Plugin which allows you to place code on amp Pages Header and in page body
The last one is not really needed, you could also writhe a function to place the code on AMP Pages, but I personally prefer to place the code through advanced ads. Sure, this is normally an advertising plugin, but it gets the job done pretty well through to its enormous features and conditions for ad-placement, or in this case, code placement.
Download the OneSignal SDK Files
Because the OneSignal Plugin for WordPress does not support this at the moment, you will need to stick to the default implementation, at least for the amp pages. Having a look at the documentation wont hurt either.
The first step is to download the SDK Files from the URL in the tables and to place them on the root your Web server, like shown below:
- https://yoursite.com/OneSignalSDKWorker.js
- https://yoursite.com/OneSignalSDKUpdaterWorker.js
| https://documentation.onesignal.com/docs/amp-web-push-setup# | AMP Template files |
- https://yoursite.com/amp-helper-frame.html
- https://yoursite.com/amp-permission-dialog.html
Get Your OneSignal App ID
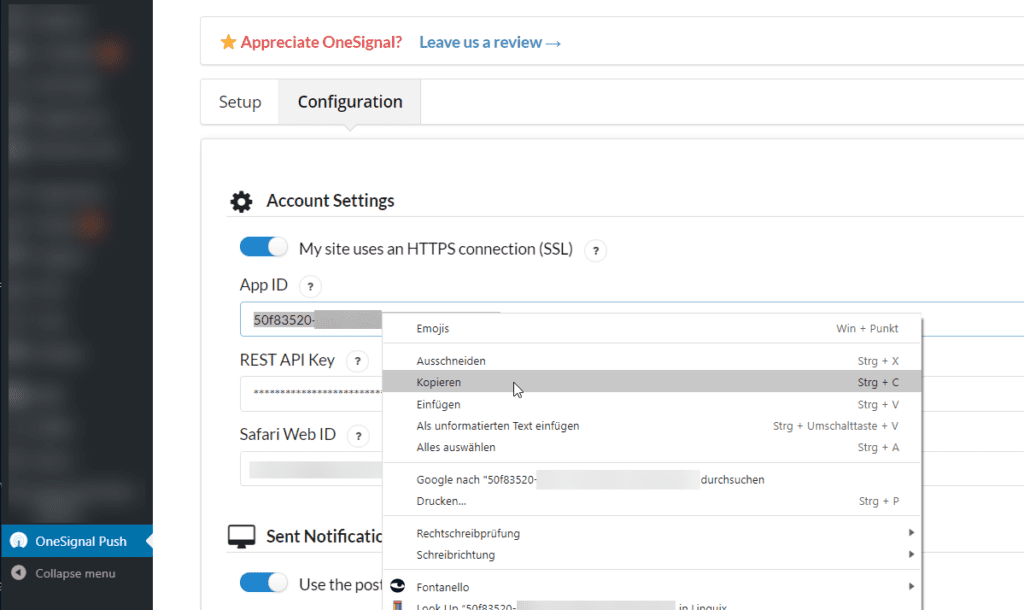
You will need to replace the App Id to your specific one in the last code snippet below. So let’s get it first, by visiting your WordPress admin area and just copying it from your OneSignal Plugin Settings Page:

Placing the required code
So, the next step is just to place the required code on amp pages (only), so that the button appears right where you want it to appear, is styled and is working.
Code for Placing the OneSignal Button
This script shoulb be placed in the amp page content html where you want the button to appear
<!-- A subscription widget -->
<amp-web-push-widget visibility="unsubscribed" layout="fixed" width="245" height="45">
  <button class="subscribe" on="tap:amp-web-push.subscribe">
    <amp-img
             class="subscribe-icon"
             width="24"
             height="24"
             layout="fixed"
             src="data:image/svg+xml;base64,PHN2ZyBjbGFzcz0ic3Vic2NyaWJlLWljb24iIHdpZHRoPSIyNCIgaGVpZ2h0PSIyNCIgdmlld0JveD0iMCAwIDI0IDI0IiB4bWxucz0iaHR0cDovL3d3dy53My5vcmcvMjAwMC9zdmciPjxwYXRoIGQ9Ik0xMS44NCAxOS44ODdIMS4yMnMtLjk0Ny0uMDk0LS45NDctLjk5NWMwLS45LjgwNi0uOTQ4LjgwNi0uOTQ4czMuMTctMS41MTcgMy4xNy0yLjYwOGMwLTEuMDktLjUyLTEuODUtLjUyLTYuMzA1czIuODUtNy44NyA2LjI2LTcuODdjMCAwIC40NzMtMS4xMzQgMS44NS0xLjEzNCAxLjMyNSAwIDEuOCAxLjEzNyAxLjggMS4xMzcgMy40MTMgMCA2LjI2IDMuNDE4IDYuMjYgNy44NyAwIDQuNDYtLjQ3NyA1LjIyLS40NzcgNi4zMSAwIDEuMDkgMy4xNzYgMi42MDcgMy4xNzYgMi42MDdzLjgxLjA0Ni44MS45NDdjMCAuODUzLS45OTYuOTk1LS45OTYuOTk1SDExLjg0ek04IDIwLjk3N2g3LjExcy0uNDkgMi45ODctMy41MyAyLjk4N1M4IDIwLjk3OCA4IDIwLjk3OHoiIGZpbGw9IiNGRkYiLz48L3N2Zz4=">
    </amp-img>
    Enable push notifications
  </button>
</amp-web-push-widget>


<!-- An unsubscription widget -->
<amp-web-push-widget visibility="subscribed" layout="fixed" width="230" height="45">
   <button class="unsubscribe" on="tap:amp-web-push.unsubscribe">Unsubscribe from updates</button>
</amp-web-push-widget>Code language: HTML, XML (xml)
Code for Styling the OneSignal Button
This CSS should be placed before the closing head (</head>) tag in the amp pages HTML code:
<style amp-custom>
    amp-web-push-widget button.subscribe {
      display: inline-flex;
      align-items: center;
      border-radius: 2px;
      border: ;
      box-sizing: border-box;
      margin: ;
      padding: 10px 15px;
      cursor: pointer;
      outline: none;
      font-size: 15px;
      font-weight: 400;
      background: #4A90E2;
      color: white;
      box-shadow:  1px 1px  rgba(, , , 0.5);
      -webkit-tap-highlight-color: rgba(, , , );
    }

    amp-web-push-widget button.subscribe .subscribe-icon {
      margin-right: 10px;
    }

    amp-web-push-widget button.subscribe:active {
      transform: scale(0.99);
    }

    amp-web-push-widget button.unsubscribe {
      display: inline-flex;
      align-items: center;
      justify-content: center;
      height: 45px;
      border: ;
      margin: ;
      cursor: pointer;
      outline: none;
      font-size: 15px;
      font-weight: 400;
      background: transparent;
      color: #B1B1B1;
      -webkit-tap-highlight-color: rgba(, , , );
    }
</style>
Code language: HTML, XML (xml)
Code for OneSignal Push notification subscribe functionality on AMP
This script should be placed before the closing body (</body>) tag in the amp pages HTML code. Remember to enter your site URL and OneSignal App ID:
<amp-web-push
    id="amp-web-push"
    layout="nodisplay"
    helper-iframe-url="https://yoursite.com/amp-helper-frame.html?appId=XXXXXXXX-YOUR-APP-ID-XXXXXXXXXXXX"
    permission-dialog-url="https://yoursite.com/amp-permission-dialog.html?appId=XXXXXXXX-YOUR-APP-ID-XXXXXXXXXXXX"
    service-worker-url="https://yoursite.com/OneSignalSDKWorker.js?appId=XXXXXXXX-YOUR-APP-ID-XXXXXXXXXXXX"
  ></amp-web-push>Code language: HTML, XML (xml)
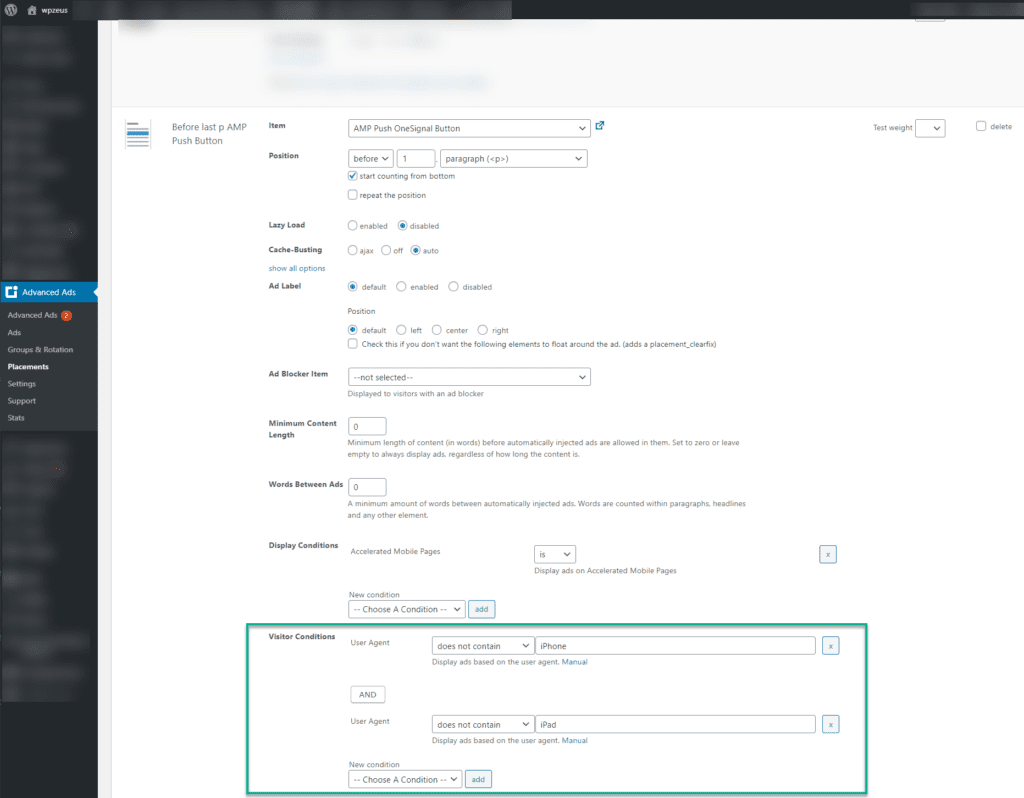
If you use Advanced Ads for placing the codes above like I do, you can also use a condition to only display this button on Android or, to be exact, non iOS devices, because OneSignal does not work on iOS… But that is an iOS, not a OneSignal problem 😎

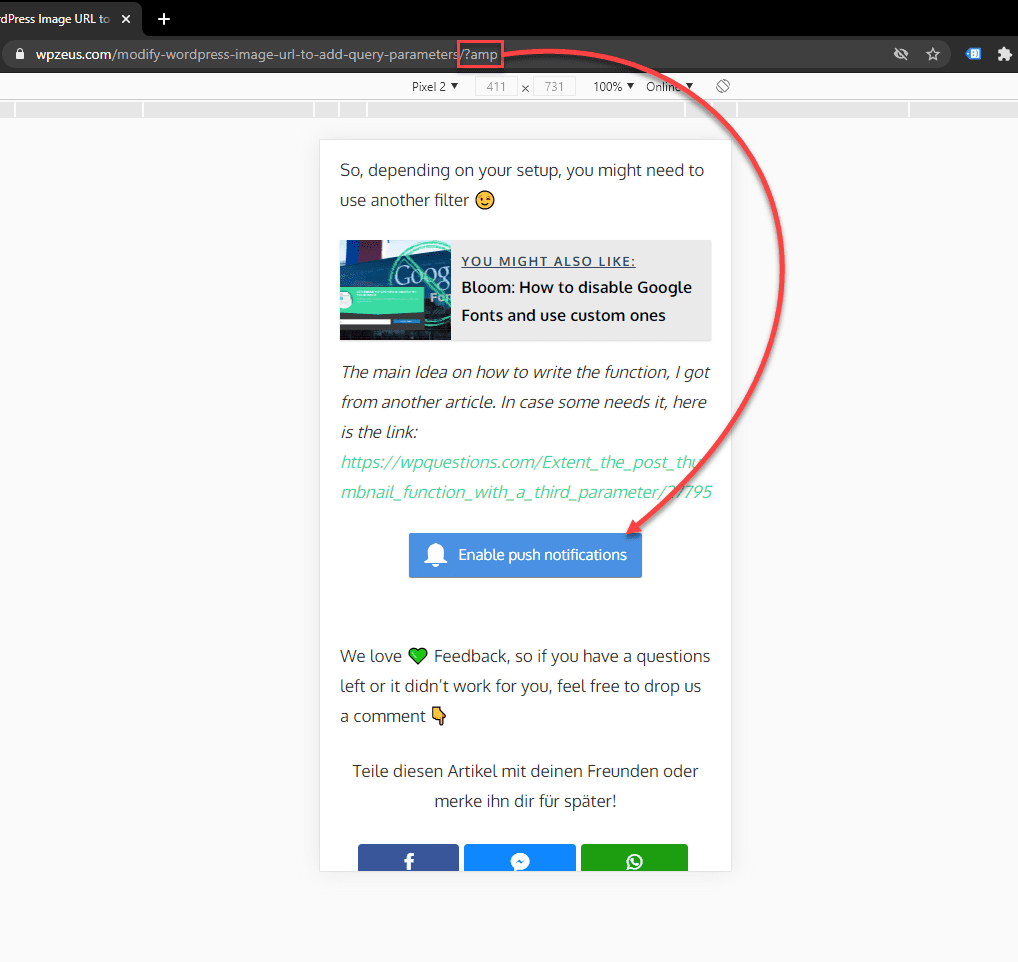
That’s about it, you should now see a OneSignal Button with a nice little icon, to enable push notifications on your amp pages, when you visit with an android device. (If you want to know how to add nice little icons to your Wordpress menu, take a look here)

We love 💚 Feedback, so if you have a questions left or it didn’t work for you, feel free to drop us a comment 👇


Thanks You…
This is helpful article.
Thank you ❤️
You’re welcome 🙂